I was feeling a bit nervous as it was the week before our installation would be shown and I did not feel ready. Not exactly on my part, but on Sean's as, compared to only 1 or 2 gems I needed to print out, he did not have nearly as many stands done as he should have.
The thing I focused on was getting the LED flashlights. I had waited on purpose until Cyber Monday to see what good deals I could get online for a massive pack of LED flashlights. I found some good deals both on Amazon and on Walmart, and I decided I'd get them tomorrow at the Walmart store.
December 1st:
Sean and I went to Walmart so that I could get the flashlights and he could get some more things for stands. We got the 20 LED flashlights for $20 ($1 each). Sean got some other things for the miscarriage stand.
I also finished my last gem in Maya. Now all there was was just to print.
December 5th:
I spent a few hours in the digital media lab printing out the last two gems. One of them, more of a diamond shaped gem, came out fine and perfect. I printed two of those, one smaller than the other, and I chose the bigger one. It was the second gem shape that gave me a lot of trouble. I changed the shape of the gem four times and did everything in my power to make sure the 3D printer was in good shape, yet still the gems came out horribly. The first attempt was a comb shaped gem which turned into piles of plastic every time I tried. I then went for a seashell shape, but the same thing would happen if it was any bigger than 4 cm tall. My third attempt was a heart shape, yet somehow the plastic wasn't coming out at certain points in the design. Finally, I resorted to make a more tear shaped pear Life Gem which somehow came out perfect. I guess the 3D model wanted to stay simple that day. Either way, I had all the Life Gems done and all the flashlights to successfully light them.
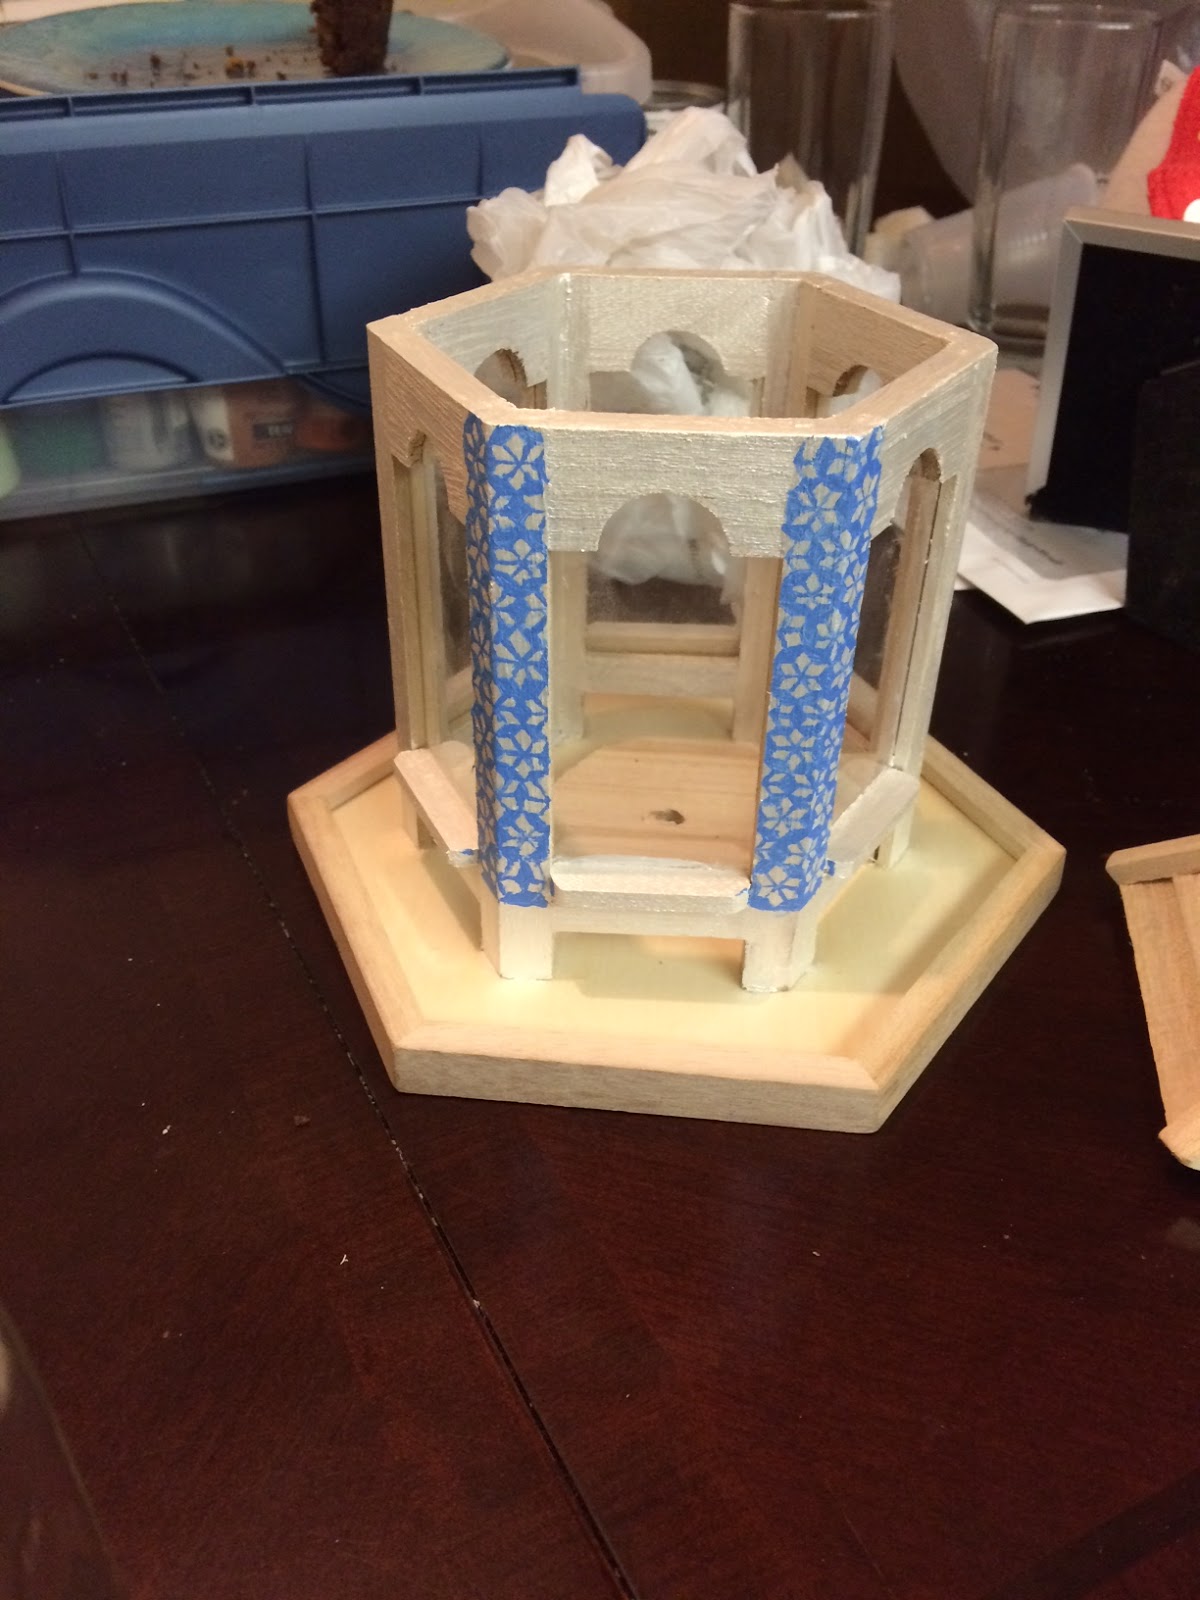
December 6th
Even though the Life Gems were finished, the stands were far behind in completion (to my frustration at my partner). We went to Michael's to look for things that could work for our remaining stands. We found more items to use for the temple, the time capsule, and the mausoleum stands. We also got some paints that would work well. I had found a poorly constructed birdhouse that resembled a temple slightly, so I decided to buy it to reconstruct it to what I wanted.
Taking the birdhouse, I carefully removed the glue that held the pillars of the birdhouse, stood the pillars up properly, and re-glued them to be more stable. Giving some time for it to cool, I then painted the birdhouse with a base of pearly white paint to give a nice sheen. The birdhouse would get three main colors: gold, white, and blue. They represented the Erawan shrine the best. I ended the day by taking out the rope that connected the roof to the rest of the temple.

December 7th - December 8th (before presentation):
This had to be the most stressful day of the project...even more than the next day. To say I was frustrated at my partner would be an understatement...I was furious at how much left he had had to do for the stands.
I first went off doing the things I said I would. I printed out pictures at the @One in the library, and I worked on the birdhouse. The pictures took little to no time as I already had the links and simply needed to get them on the USB, pay for the paper I was using, and cut them to size at the station next door. The birdhouse took much longer. When it comes to detailing, I can be a bit of a tedious person, and I was applying a small pattern to 4/6 of the pillars (the others were being spray painted gold. It was hard and long work, but I was happy to see the result when it was done. I was also very happy to see that Sean had burnt items for the rubble under the temple while I was doing detail work. We switched from my house to his once the detail job was over. Painting the rest of the temple was a lot easier since it was simple stuff. I used black for the bottom border, spray painted the temple and last two pillars gold, and used bronze for the inside of the temple. Last of all, the broken Life Gems were placed inside, and I was happy to see how the finished result looked like some unusual mini shrine.


After that, it was mainly helping Sean out. Both of us knew that sleep was going to be highly scarce that night, and there was still a lot to be done. The car accident cross had not been made (I was already mad that Sean never burnt the luggage, and the mausoleum had not been started (again...this was a day where I was practically fuming at my partner for his slacking). I worked to arrange the finished stands with the pictures and Life Gems added, and I also colored the LED lights so every gem had a different feel. The time capsule stand was the first to be entirely finished and set, and it was my favorite to set up. I worked to paper maché cardboard into two placeholders for the mausoleum (one for the Life Gem, the other for the flowers) and spray paint them bronze when they were dry. I made sure the miscarriage stand was properly arranged, and I filled out the birth and death certificates for the twins after looking to find a better birth certificate to use. With Sean's help, I looked for and found more things to place into Bridget Finn's bag and characterize her as the adventurous pilot. I also helped find a way to secure the Car accident cross Sean had made with him, and I figured out that the shoes made great placeholders for the Life Gems of the Garza family.

I finally got my break to sleep a little around 6am. Just an hour and a half of sleep...but seeing the mausoleum still in the beginner stage made me want to fume. I didn't though...as I had not eaten, slept very little, and had a partner going through a bit of a meltdown. I just worked to figure out a solution...and I decided to only use the placeholders for my grandparent's showing (seeing as Sean didn't even have a picture of his grandmother) and stick them to the wall.
No comments:
Post a Comment